
After a long day of sea kayaking, alpine climbing or even a mellow day of driving for a weekend car camping trip, nothing tastes quite like melted cheese and perfectly sautéed veggies on top of homemade crust. That’s right. Bring on the backcountry pizza. This post will teach you everything you need to know about cranking out personal pies for your buddies in the backcountry.
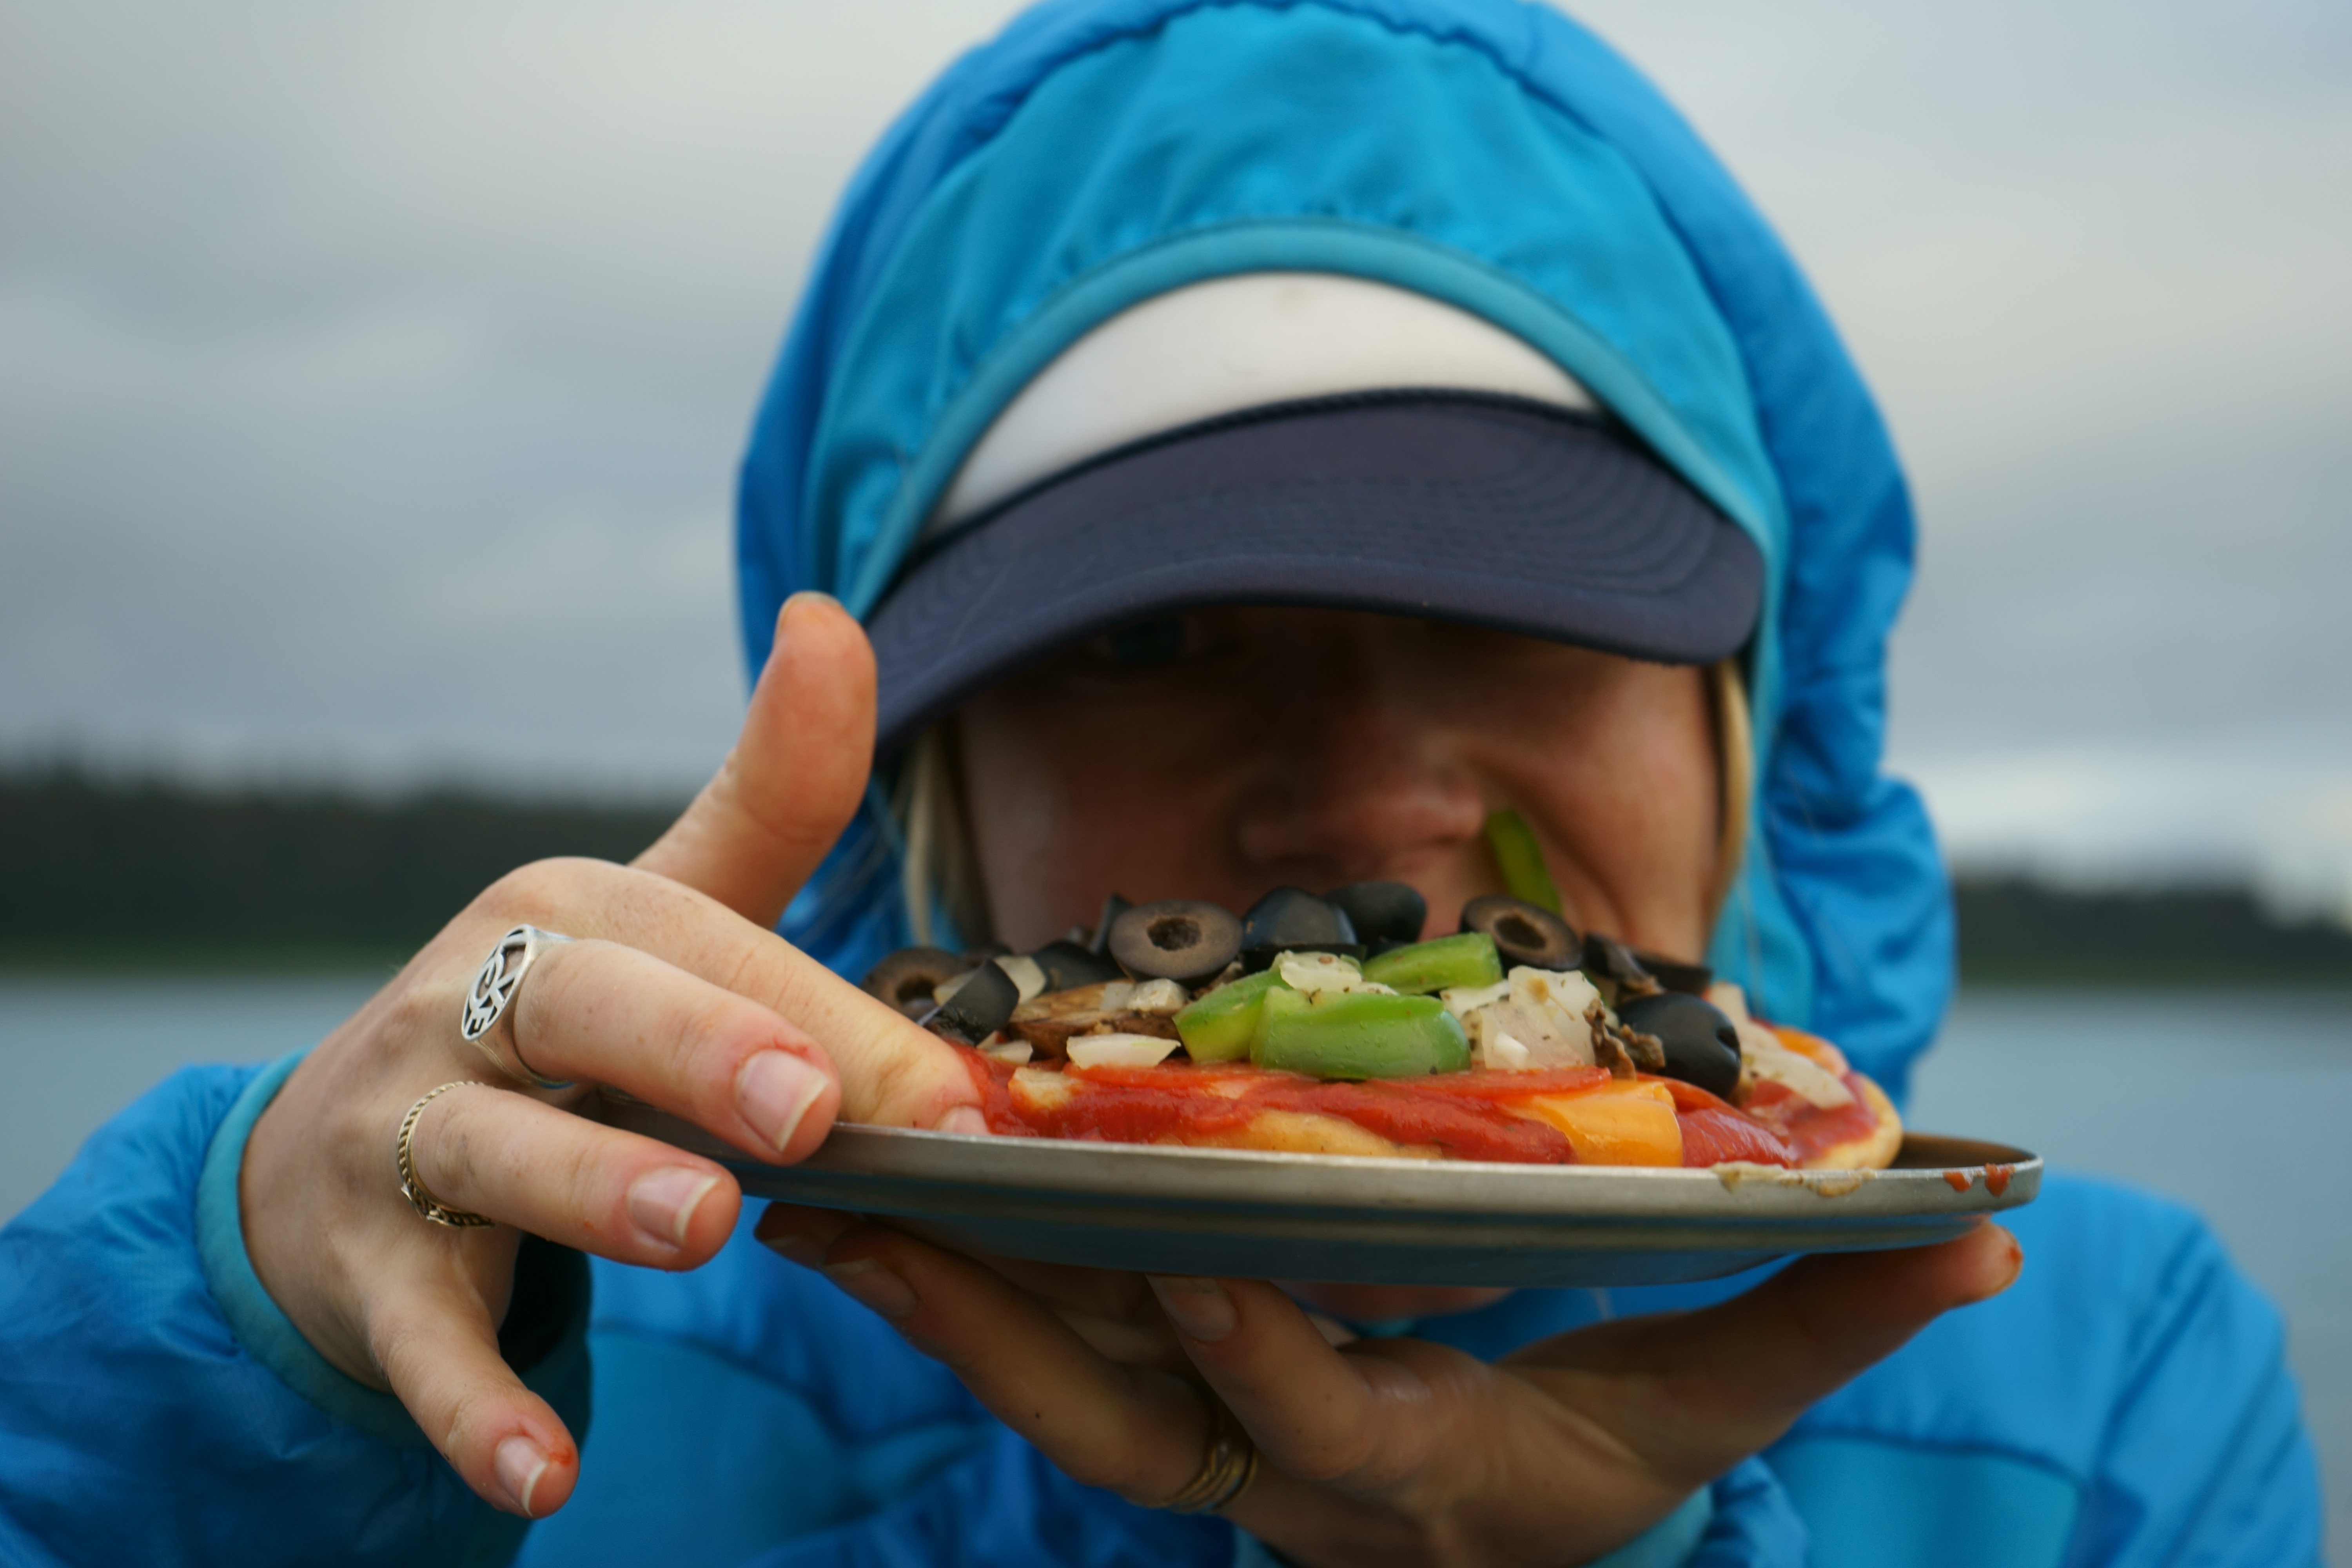
An expedition favorite.
Skeptics will say that “baking” on a camping stove is impossible. That’s simply not true. Utilizing reduced heat and the right pan, most camping stoves or fires can be turned into a makeshift oven. For the best pizza, the Fry Bake is a critical piece of kit for any one committed to preparing delicious food outside. Used for years by the National Outdoor Leadership School (NOLS) for season after season of month-long expeditions, these little pans are extremely durable and allow for Advanced Placement level baking of pizza, empanadas, cornbread—you name it.
Ingredients:
-Flour (.75 lbs for two people, 1 for three, 1.25-1.5 for 4)
-One packet of Red Star brand yeast
-Italian seasonings (oregano, parsley, garlic powder)
-Brown sugar or honey
-Olive oil
Suggested toppings:
Be creative. There is all sorts of interesting things out there (see tips for some extra information about sourcing locally). Some go to ingredients are:
-Mozzarella and cheddar
-Tomato base with garlic powder
-Olives
-Canned artichoke hearts
-Broccoli
If you get bored of red sauce pizza, try making a white sauce or pesto!

Melted goodness.
Steps:
- Prepare your yeast. This is done by activating living yeast with sugar and warm water. Use at least a tablespoon of your sugar. If you have untreated water, get it to a rolling boil and then allow it to cool until warm. Mix in ½ packet of yeast, allow to activate for 2-5 minutes, add second ½ and allow to react for 5 minutes.
- Mix yeast and flour. Mixing your yeast mixture with your flour, gradually turn lumpy dough into consistent, pliable dough. *Make sure you don’t add too much water! Once you add too much water and are out of yeast, you’re sort of out of luck, unless you have oats, instant potatoes or other things you can make it less runny and sticky with.
- Knead dough. This is an important step as it allows the yeast to be evenly distributed throughout. If mixing in a bowl, you can do this with clean hands or a spatula. If you’re preparing the dough in a plastic bag, you can simply mash it with your hands through the bag,
- Rising. Depending on whether you are going for a heartier, “bready” pizza or a thin crust style, rising times will very. It’s worth mentioning that the process of rising puts air in the dough and magically (well, chemically) makes the amount of dough you have expand. This is a welcomed process for most hungry backcountry adventurers.
- Baking. In a heated frybake or pan with snug fitting lid, heat oil on low heat. If cooking on an MSR Whisperlite™ you can depressurize the liquid fuel pump by unscrewing it once it is primed and out. Most iso-pro stoves have a low, simmer setting. Using low heat, allow the dough to brown and rise on one side in a sealed pan. This may take some practice as varying temperatures on different stoves will make times different. Flip and add ingredients.
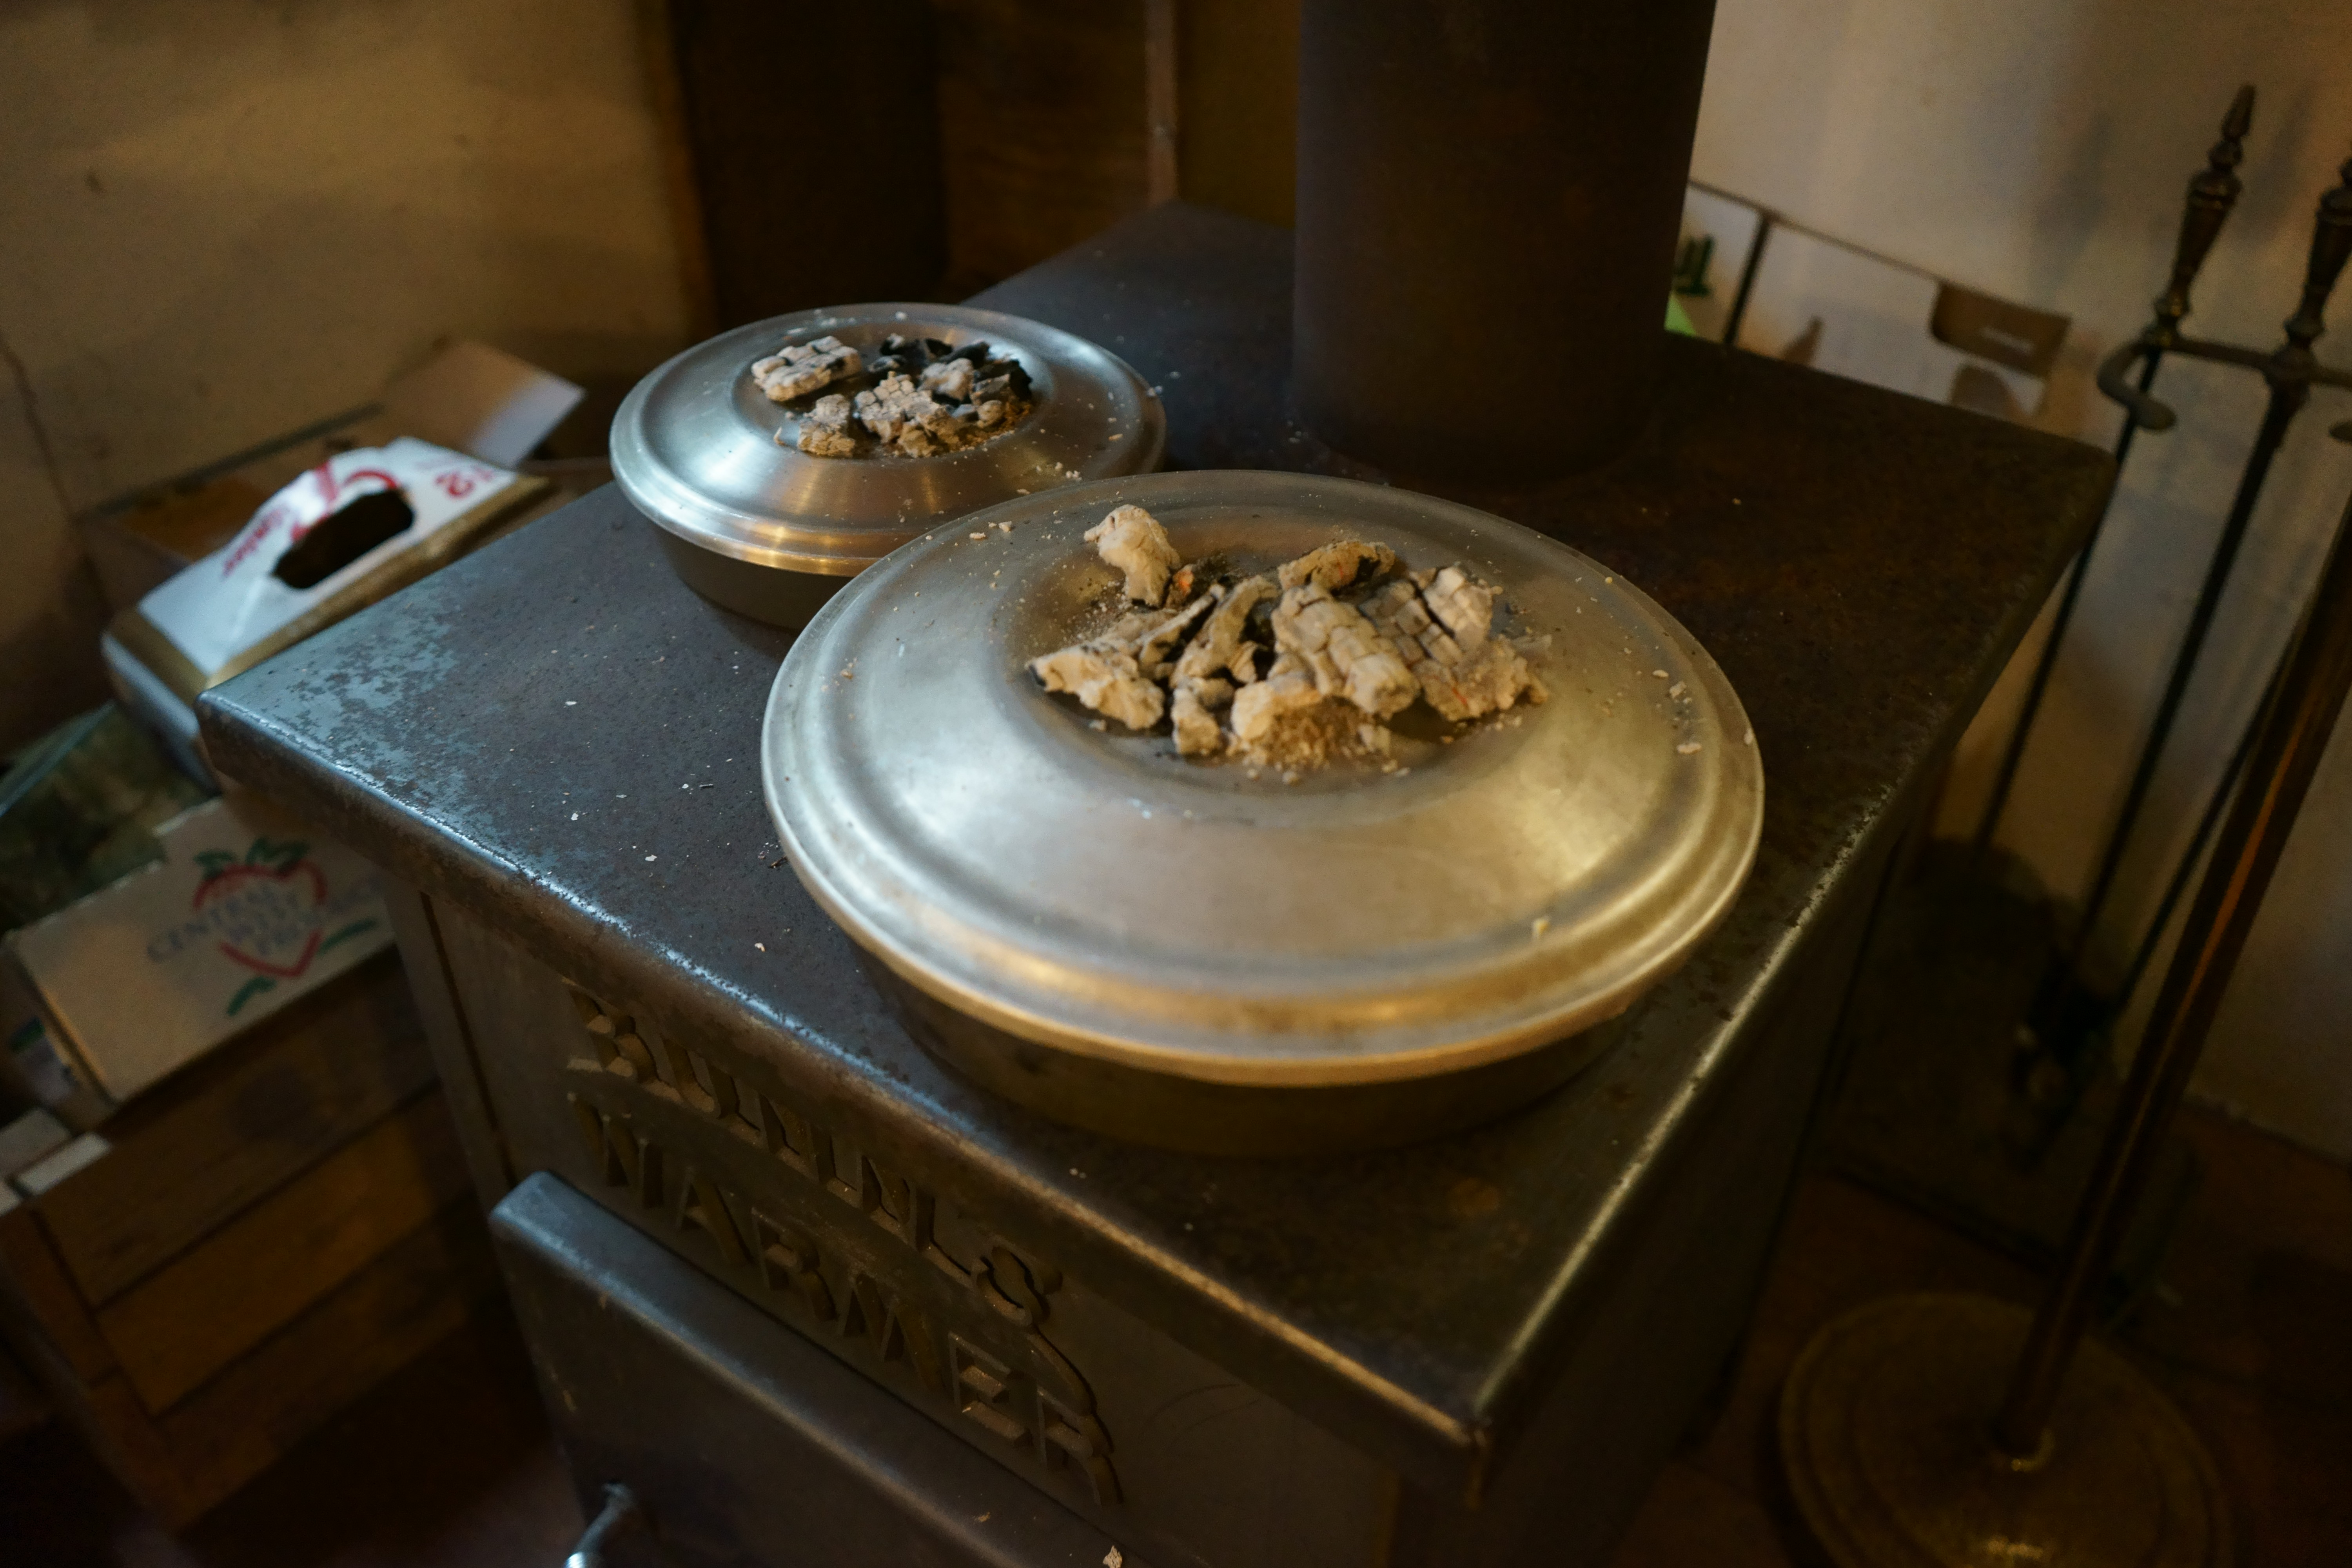
Pizzas can also be baked on wood-burning stoves for an ultimate rainy cabin dinner.
Extra Tips:
The “steam method.” If your crust is looking (and smelling) done but your cheese isn’t melted, try using the “steam method.” Just pour a teaspoon of water down the side of your hot fry bake, which should be hot enough to turn it to vapor and close the lid. This should melt the cheese and finish the job.
Foraging. Try implementing some wild edibles. In some recent pizzas baked in Southeast Alaska, we utilized beach lovage (a relative of parsley with similar flavor) and dock in the dough and fresh on top. In alpine areas such as California’s Sierra Nevada, wild onion is pretty abundant and easy to find and makes for a great flavor booster in your dough. Disclaimer: foraging in places that have a lot of biodiversity and plants that look similar (such as Alaska) requires careful attentiveness. Seek local or experienced knowledge and when in doubt, don’t eat things. If you study enough and have a good guide however, adding wild plants to any backcountry dish can be a welcomed treat.
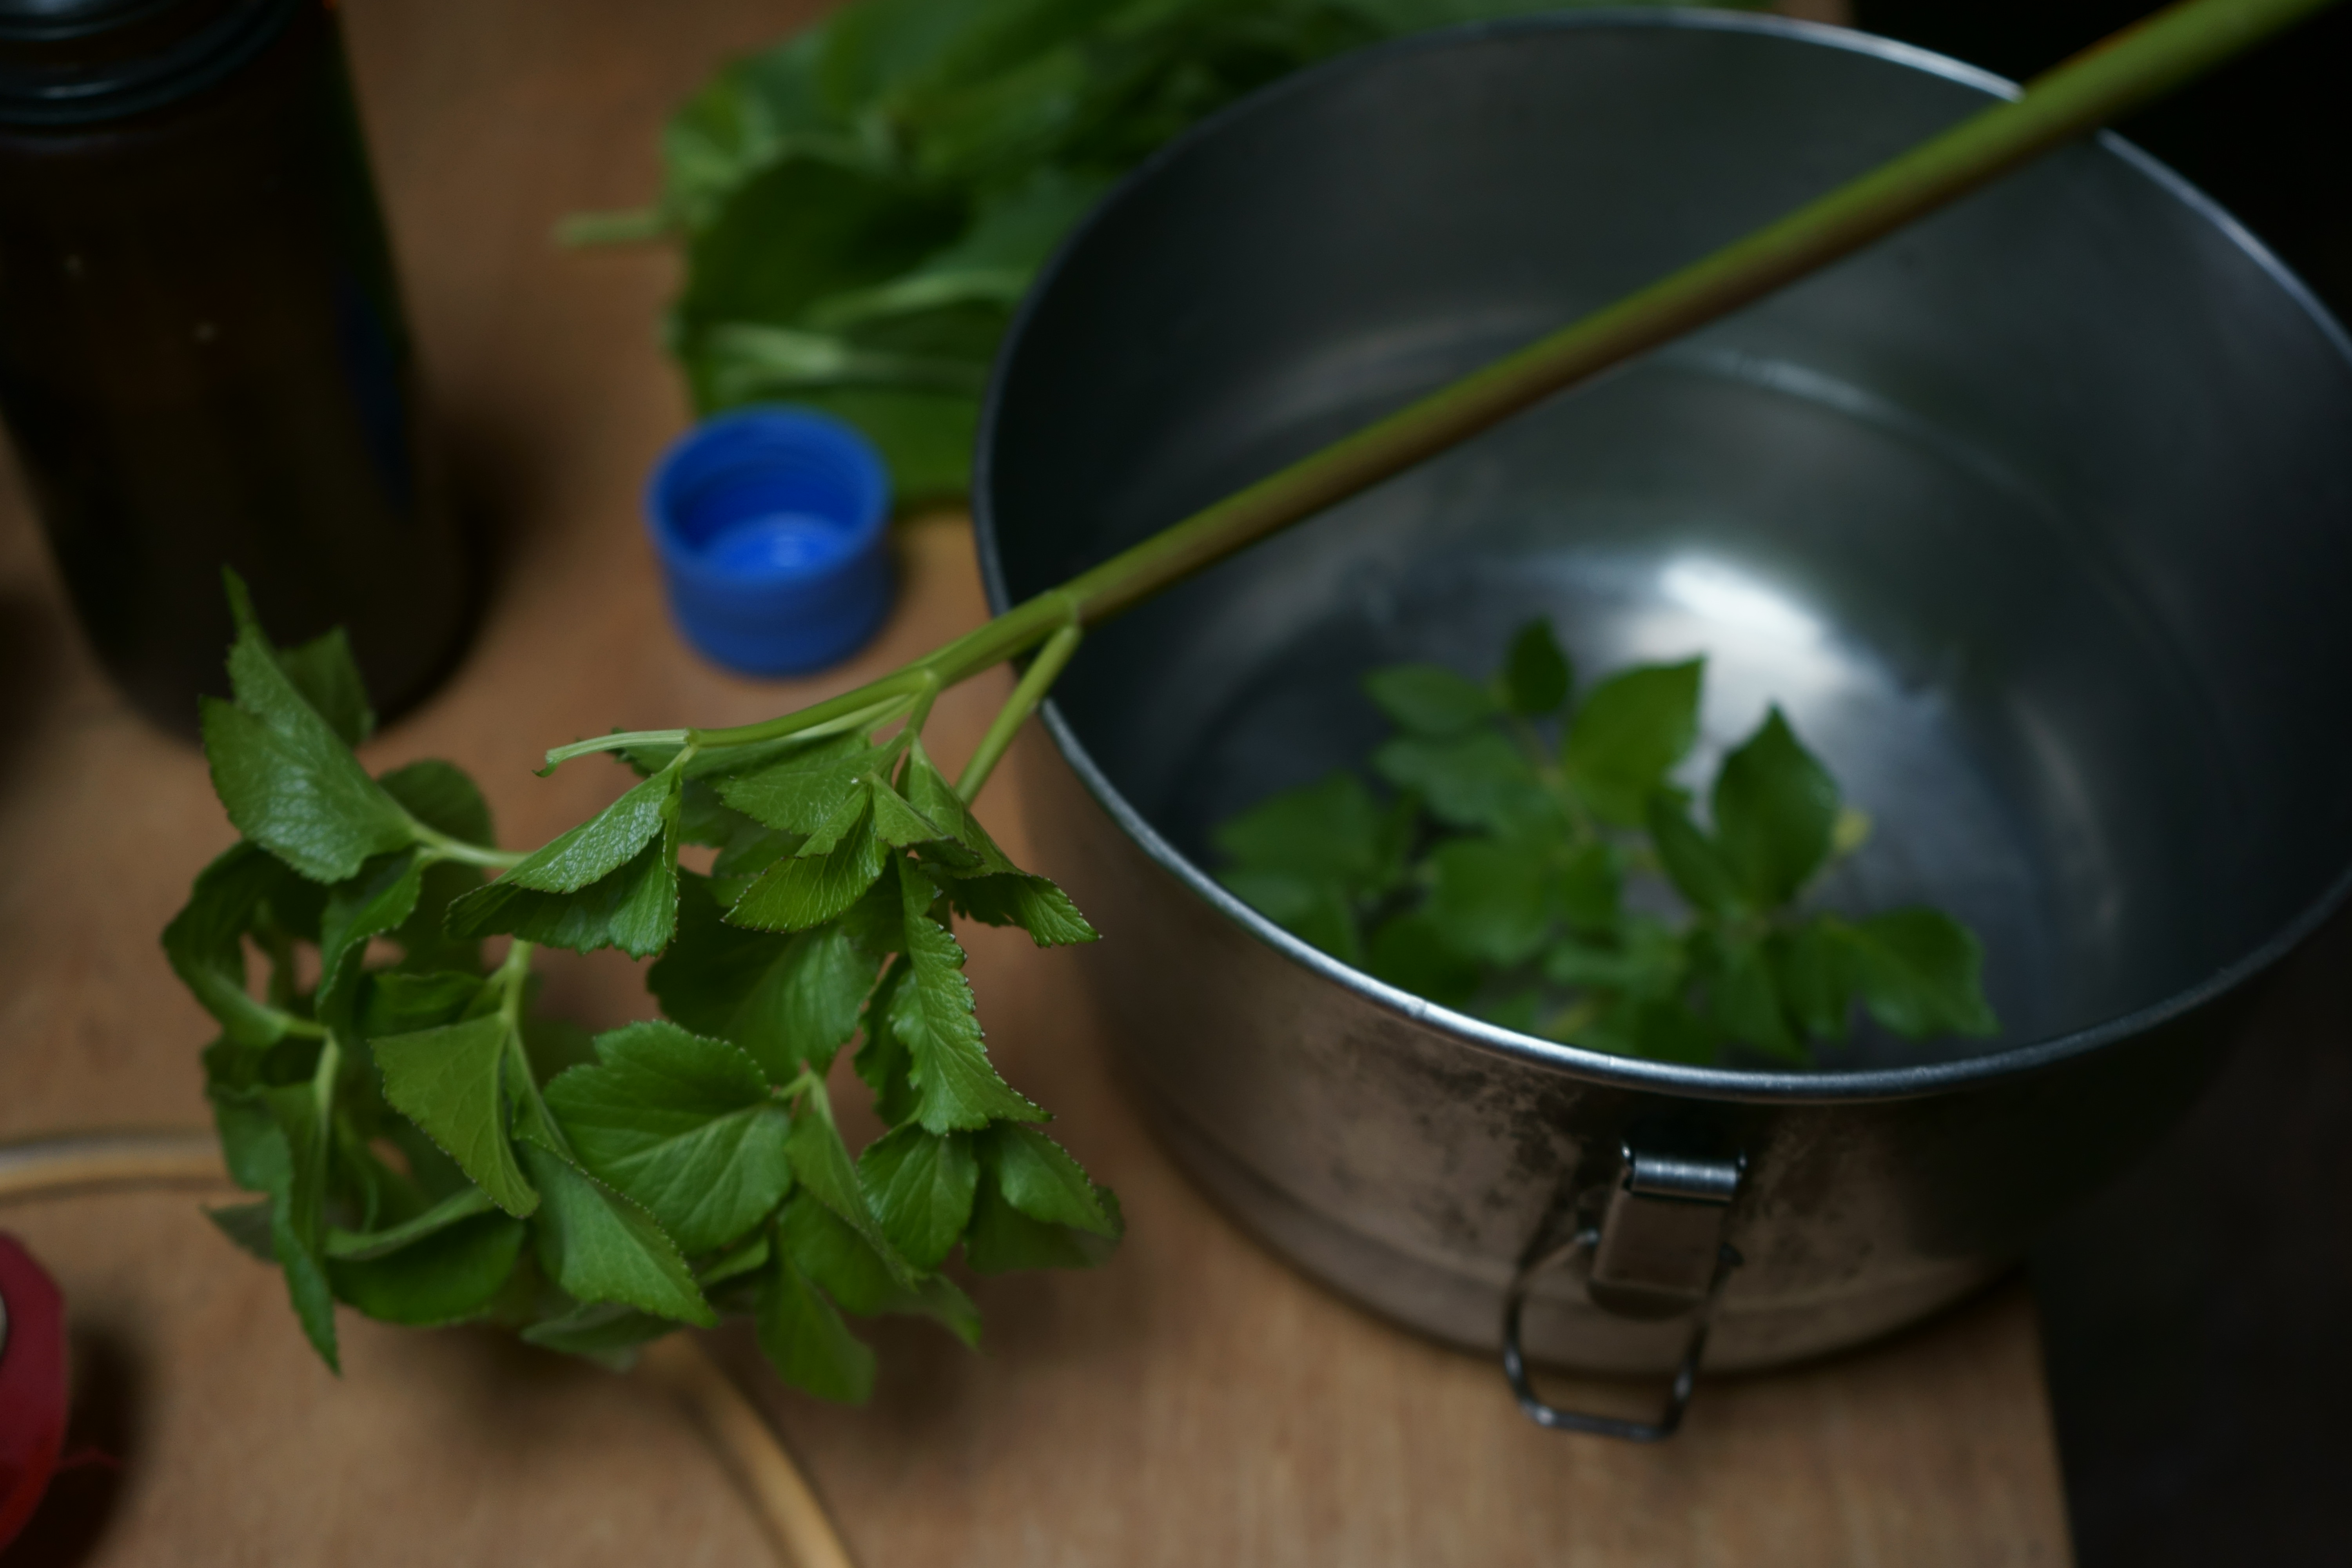
Beach lovage, a relative of parsley.
_______________________________________
Most importantly, enjoy the process. Involve your tent mates and work together. Part of the fun of this style of backcountry cooking is collaboration. Buen provecho!

Preparing backcountry pizzas in Glacier Bay National Park, Alaska.

Enjoy with some Bota Box boxed wine.


Leave a comment